The Honeywell TH6320R1004 installation manual provides a comprehensive guide for setting up and optimizing your thermostat, ensuring efficient HVAC control and energy savings for all users․
1․1 Overview of the Honeywell TH6320R1004 Thermostat
The Honeywell TH6320R1004 is a programmable thermostat designed for efficient control of heating, ventilation, and air conditioning (HVAC) systems․ It offers precise temperature management, ensuring comfort and energy savings․ With a user-friendly interface and a large, backlit display, this thermostat provides clear information on current settings and system status․ It supports various programming options, including 7-day, 5-2 day, and 1-week schedules, allowing users to customize temperature settings based on their lifestyle․ The device is compatible with multiple HVAC systems, including heat pumps and multi-stage systems, making it versatile for different environments․ Its wireless remote control capability enhances convenience, enabling users to adjust settings from any room․ The Honeywell TH6320R1004 is built for reliability and long-term performance, ensuring consistent temperature control and energy efficiency․
1․2 Importance of Proper Installation
Proper installation of the Honeywell TH6320R1004 thermostat is crucial for ensuring optimal performance, energy efficiency, and system reliability․ Incorrect installation can lead to inefficient heating or cooling, increased energy bills, and potential damage to the HVAC system․ It is essential to follow the step-by-step instructions provided in the manual to avoid common mistakes, such as incorrect wiring or improper mounting․ Proper installation ensures accurate temperature control, seamless functionality of advanced features, and compatibility with the existing HVAC system․ Additionally, correct setup guarantees safety by preventing electrical hazards or system malfunctions․ By adhering to the installation guidelines, users can maximize the thermostat’s capabilities, enjoy long-term durability, and maintain a comfortable indoor environment․ Proper installation is the foundation for trouble-free operation and energy-saving benefits․

Product Overview
The Honeywell TH6320R1004 is a programmable thermostat designed for efficient HVAC control, offering precise temperature management and a user-friendly interface with advanced scheduling and energy-saving features․
2․1 Key Features of the Honeywell TH6320R1004
The Honeywell TH6320R1004 features a large, easy-to-read LCD display, 7-day programmable scheduling, and compatibility with various HVAC systems, including heat pumps and multi-stage systems․ It offers precise temperature control, energy-saving modes, and a wireless remote control option for convenient adjustments․ The thermostat supports both conventional and heat pump applications, ensuring flexibility for different home setups․ With its intuitive interface, users can easily navigate through settings and customize their heating and cooling preferences․ Additionally, it includes a backlight for better visibility and a battery compartment for power backup․ These features make the Honeywell TH6320R1004 an ideal choice for homeowners seeking reliable and efficient climate control․
2․2 Compatibility with HVAC Systems
The Honeywell TH6320R1004 thermostat is designed to work seamlessly with a wide range of HVAC systems, including multi-stage heating and cooling systems, heat pumps, and systems with auxiliary heat․ It is compatible with both conventional and heat pump applications, making it a versatile option for various home setups․ The thermostat supports multiple wiring configurations, ensuring it can integrate with existing HVAC systems without requiring extensive modifications․ Its compatibility extends to residential and commercial environments, offering reliable performance in different settings․ Whether you have a standard furnace or a complex multi-stage system, the Honeywell TH6320R1004 ensures precise temperature control and efficient energy use․ This broad compatibility makes it an ideal choice for users looking to upgrade or install a new thermostat․
2․3 Design and Display Features
The Honeywell TH6320R1004 features a sleek and user-friendly design with an easy-to-read LCD display․ The large, backlit screen provides clear information about the current temperature, system status, and settings, making it accessible for users of all ages․ The thermostat’s interface includes intuitive navigation buttons, allowing for seamless programming and adjustments․ Its compact wall-mounted design ensures it blends seamlessly into any home decor․ The display offers real-time updates, ensuring users can monitor and control their HVAC system efficiently․ Additionally, the thermostat’s durable construction ensures long-term reliability, while its ergonomic design enhances user comfort during operation․ These design and display features collectively contribute to a hassle-free experience, making the Honeywell TH6320R1004 a practical and stylish choice for modern homes․
Installation Steps
The Honeywell TH6320R1004 installation manual offers a comprehensive guide for a smooth setup process․ It covers pre-installation checks, mounting, wiring, and final system checks to ensure proper functionality and safety․
Before installing the Honeywell TH6320R1004 thermostat, ensure you have a compatible HVAC system and necessary tools․ Verify power is off at the circuit breaker and furnace switch․ Check wiring compatibility with the thermostat’s terminal designations․ Familiarize yourself with the manual to understand the installation process and safety precautions․ Ensure the thermostat is purchased from an authorized dealer to maintain warranty validity․ Proper preparation ensures a safe and efficient installation․ To mount the Honeywell TH6320R1004 thermostat, begin by unpacking the device and ensuring all components are included․ Locate a suitable wall position, ideally in a central area with good air circulation, avoiding direct sunlight or drafts․ Use the provided wallplate to mark the screw holes, ensuring the surface is level․ Drill pilot holes if necessary and secure the wallplate with screws․ Gently remove the thermostat from its packaging and align it with the wallplate, ensuring proper alignment of the mounting tabs․ Secure the thermostat firmly to the wallplate using the provided screws, taking care not to overtighten․ Double-check that the device is level and evenly mounted to ensure accurate temperature readings and proper functionality․ This step ensures a stable and precise installation․ Wiring the Honeywell TH6320R1004 thermostat requires careful attention to ensure proper system operation․ Begin by turning off the power to your HVAC system at the circuit breaker․ Remove the existing thermostat and label the wires according to their functions (e․g․, R, W, Y, G, C) for easy identification․ Mount the new wallplate and connect the wires to the corresponding terminals on the thermostat, ensuring secure connections․ Refer to the manual for specific terminal assignments․ After wiring, turn the power back on and test the system to confirm proper functionality․ If you encounter any issues, consult the troubleshooting section of the manual for guidance․ Proper wiring is essential for accurate temperature control and efficient system performance․ Always follow safety precautions when working with electrical systems․ After completing the wiring and mounting, perform a series of final checks to ensure the Honeywell TH6320R1004 thermostat is installed correctly․ Verify that all wires are securely connected to the appropriate terminals and that the thermostat is properly mounted on the wall․ Turn the power back on at the circuit breaker and test the thermostat by adjusting the temperature settings to confirm the HVAC system responds correctly․ Check for any error messages on the display and ensure the system cycles on and off as expected․ Review the manual to confirm all installation steps were followed accurately․ Finally, program the thermostat according to your preferences and perform a test run to ensure everything functions smoothly․ This thorough verification process guarantees optimal performance and energy efficiency from your new thermostat․ The Honeywell TH6320R1004 allows users to set the time, date, and schedule temperature adjustments with ease, offering flexible programming options for optimal comfort and energy efficiency․ Setting the time and date on your Honeywell TH6320R1004 thermostat is a straightforward process․ Start by pressing the “Menu” button to access the main settings․ Use the up or down arrows to navigate to the “Time and Date” option and press “Select․” Enter the current time using the numerical keypad, ensuring the format matches the display (HH:MM:SS AM/PM)․ Next, set the date by scrolling to the correct month, day, and year․ Once done, press “Save” to store your settings․ Accurate time and date are crucial for scheduling and energy-saving features to function properly․ Always refer to the manual for detailed instructions if needed․ This ensures your thermostat operates efficiently and maintains optimal performance throughout the year․ Proper setup guarantees precise temperature control and energy efficiency tailored to your daily routine․ Scheduling temperature adjustments on the Honeywell TH6320R1004 thermostat allows you to customize your comfort and energy usage․ Press the “Menu” button, navigate to “Schedule” using the arrows, and select “Program Schedule․” Choose from 7-day, 5-2 day, or 1-week programming options․ For each period, set the desired temperature and time․ Use the up/down arrows to adjust temperatures and the left/right arrows to move between periods․ Once satisfied, press “Save” to store your schedule․ This feature ensures your home maintains optimal temperatures during specific times, enhancing energy efficiency and comfort․ Regularly review and update your schedule to reflect lifestyle changes․ Proper scheduling can significantly reduce energy consumption while keeping your environment comfortable year-round․ Always refer to the manual for detailed guidance on advanced scheduling options․ The Honeywell TH6320R1004 offers flexible programming options to suit your lifestyle and energy-saving goals․ You can choose from 7-day, 5-2 day, or 1-week programming schedules․ The 7-day option allows different settings for each day, while the 5-2 day option lets you set consistent weekday and weekend schedules․ The 1-week option provides the same schedule every day for simplicity․ Each program period can be customized with specific start times and temperatures․ To access these options, press the “Menu” button, navigate to “Program Schedule,” and select your preferred schedule type․ Use the arrow buttons to set temperatures and times for each period․ The thermostat also features energy-saving modes, such as automatic temperature adjustments based on your HVAC system type․ These options ensure efficient heating and cooling while maintaining comfort․ Refer to the manual for detailed steps on configuring these settings․ The Honeywell TH6320R1004 offers advanced features like remote control pairing, zone control for multiple rooms, and energy-saving modes to enhance comfort and efficiency․ The Honeywell TH6320R1004 thermostat supports remote control setup, enabling convenient temperature adjustments from anywhere in your home․ To pair the remote control, ensure both devices are within range․ Press the MENU button on the thermostat, navigate to Wireless Setup using the arrow keys, and select it․ A pairing code will appear on the display․ On the remote control, press and hold the Connect button until the LED flashes․ Enter the pairing code using the remote’s buttons․ Once paired, the remote control will communicate with the thermostat seamlessly․ For detailed instructions, refer to the manual․ This feature allows for enhanced flexibility and ease of use, ensuring optimal comfort without needing to physically interact with the thermostat․ Troubleshooting tips are also provided in the manual for any pairing issues․ The Honeywell TH6320R1004 thermostat offers advanced zone control capabilities, allowing precise temperature management across multiple rooms․ By integrating with multiple thermostats, users can independently monitor and adjust temperatures in different zones․ This feature is particularly useful for larger homes or commercial spaces where uniform heating and cooling are challenging․ To set up zone control, install thermostats in each room and use the TOGGLE ZONE buttons to switch between zones․ The thermostat’s interface simplifies navigation, enabling users to customize settings for each area․ This system ensures energy efficiency by only heating or cooling occupied spaces, reducing overall energy consumption․ The manual provides detailed steps for configuring and optimizing zone control, ensuring a tailored and comfortable environment in every room․ This feature enhances the thermostat’s functionality, making it a versatile solution for diverse heating and cooling needs․ The Honeywell TH6320R1004 thermostat is designed with energy efficiency in mind, offering features to reduce consumption and lower utility bills․ Its programmable scheduling allows users to set specific temperature adjustments throughout the day, optimizing energy use․ The thermostat also includes an energy-saving mode that minimizes heating and cooling when the home is unoccupied or when the desired temperature is reached․ Additionally, it provides energy reports to track usage patterns, helping users identify areas for improvement․ The thermostat’s compatibility with smart sensors further enhances energy savings by automatically adjusting settings based on the home’s conditions․ With these features, the Honeywell TH6320R1004 promotes sustainable and cost-effective temperature control, making it an ideal choice for eco-conscious users․ Its advanced capabilities ensure a balance between comfort and energy efficiency․ The Honeywell TH6320R1004 manual provides solutions for common issues, such as remote control pairing, error codes, and system responses, ensuring quick resolution for optimal thermostat performance․ Common issues with the Honeywell TH6320R1004 thermostat include unresponsiveness, incorrect temperature readings, and connectivity problems․ If the thermostat is unresponsive, check circuit breakers and ensure power is on․ For incorrect temperatures, verify sensor placement and avoid heat sources․ Connectivity issues may require resetting the thermostat or ensuring devices are within range․ Perform a factory reset by pressing and holding the menu button for 10 seconds to restore default settings․ If the remote control fails, re-pairing or replacing batteries may resolve the issue․ Always refer to the manual for detailed troubleshooting steps․ Regular maintenance, such as cleaning the screen and updating software, can prevent many issues․ The Honeywell TH6320R1004 thermostat may display error codes to indicate specific issues․ For instance, E1 typically signifies a communication failure between the thermostat and the wireless remote control, often due to a power outage or out-of-range devices․ To resolve this, reset the circuit breaker, ensure the thermostat is powered on, and re-pair the remote control․ E2 may indicate a problem with the temperature sensor, such as incorrect placement or blockage․ Relocating the sensor to an area with proper airflow and avoiding direct sunlight or heat sources can fix this issue․ Always refer to the manual for a complete list of error codes and their solutions to address problems effectively․ Regular maintenance, like cleaning the display and ensuring proper wiring, can help prevent these errors․ Resetting the Honeywell TH6320R1004 thermostat can resolve various issues without affecting programmed settings․ To perform a system reset, press and hold the MENU button for 5 seconds until the display goes blank․ Release the button and wait for the system to restart․ This resets all operating parameters to factory defaults, including temperature setpoints and scheduling․ For a full factory reset, which erases all user settings, go to the MENU, scroll to Settings, select Reset, and choose Factory Reset․ After resetting, reconfigure your preferences and pair any wireless accessories again․ Regular resets can help maintain optimal performance and address persistent glitches․ Always refer to the manual for detailed instructions․ Regularly clean the thermostat screen with a soft cloth to ensure clear visibility․ Replace batteries annually or when low battery is indicated․ Update software periodically for optimal performance․ Regular cleaning of the Honeywell TH6320R1004 thermostat is essential to maintain its performance and accuracy․ Use a soft, dry cloth to gently wipe the display screen and exterior surfaces․ Avoid using harsh chemicals, abrasive cleaners, or moist cloths, as they may damage the screen or internal components․ For stubborn smudges or dust buildup, lightly dampen the cloth with water, but ensure it is not soaking wet to prevent moisture damage․ Cleaning the thermostat regularly helps prevent dust and dirt from interfering with temperature sensors, ensuring precise temperature readings․ Additionally, avoid touching the screen unnecessarily, as fingerprints can leave smudges and obscure visibility․ By maintaining a clean thermostat, you can ensure optimal functionality and extend its lifespan․ Always refer to the manual for specific cleaning recommendations to avoid voiding the warranty․ Replacing batteries in the Honeywell TH6320R1004 thermostat is a straightforward process to ensure continuous operation․ Locate the battery compartment, typically found at the rear or bottom of the thermostat․ Open the compartment by sliding it or using a screwdriver as indicated․ Remove the old batteries and dispose of them properly․ Insert the new AA alkaline batteries, making sure to align the positive and negative terminals correctly․ Close the compartment securely to maintain the thermostat’s functionality․ If the thermostat is not functioning after replacing the batteries, check the connections and ensure the batteries are installed correctly․ For optimal performance, use high-quality batteries and replace them every 12-18 months or when the low-battery indicator appears on the display․ Always refer to the manual for specific instructions to avoid any potential issues․ Updating the software of your Honeywell TH6320R1004 thermostat is essential to ensure optimal performance, security, and access to the latest features․ To check for updates, navigate to the thermostat’s menu, select “Settings,” and then “Software Update․” If an update is available, follow the on-screen instructions to download and install it․ Some updates may require a USB drive for manual installation, which can be done by downloading the update from Honeywell’s official website and transferring it to the thermostat․ After completing the update, restart the thermostat to apply the changes․ Always refer to the user manual for detailed steps, as improper updates may disrupt functionality․ Regular software updates help maintain system efficiency and compatibility with your HVAC system․ The Honeywell TH6320R1004 thermostat is backed by a 3-year limited warranty covering defects in materials and workmanship․ The warranty excludes the battery and requires product registration for validation․ The Honeywell TH6320R1004 thermostat is protected by a 3-year limited warranty, ensuring coverage for defects in materials and workmanship under normal use․ This warranty applies to the thermostat’s electrical components and mechanical parts, providing users with assurance of product reliability․ The warranty period begins on the date of purchase, as indicated on the sales receipt․ Coverage excludes the battery and any damage resulting from misuse, improper installation, or external factors like power outages․ Additionally, the warranty does not cover costs associated with removal or reinstallation of the product․ To maintain warranty validity, users must adhere to the installation and usage guidelines outlined in the manual․ Proper registration of the product is also recommended to streamline warranty claims and ensure comprehensive support․ Registering your Honeywell TH6320R1004 thermostat is a straightforward process that ensures you receive full warranty benefits and access to exclusive support services․ To register, visit the Honeywell website and navigate to the product registration section․ You will need to provide your contact information, product serial number, and purchase details․ This step ensures your product is verified and covered under the manufacturer’s warranty terms․ Registration also grants access to software updates, troubleshooting resources, and personalized customer support․ It is recommended to complete this process shortly after installation to maximize the benefits of your thermostat․ For detailed registration instructions, refer to the manual or contact Honeywell customer service for assistance․ Proper registration ensures seamless support and enhances your overall product experience․ The Honeywell TH6320R1004 thermostat offers efficient temperature control and energy savings, supported by a comprehensive manual ensuring smooth installation and optimal performance for enhanced home comfort․ The Honeywell TH6320R1004 installation manual is a comprehensive guide that ensures smooth setup and optimal use of the thermostat․ It covers essential steps such as pre-installation requirements, mounting, wiring, and final checks to guarantee proper functionality․ The manual also emphasizes the importance of understanding the thermostat’s key features, including its compatibility with various HVAC systems and advanced programming options․ Troubleshooting common issues and maintaining the device through cleaning and battery replacement are also highlighted․ By following the manual’s instructions, users can maximize energy efficiency, customize temperature settings, and enjoy a comfortable environment year-round․ This guide is indispensable for both new and experienced users seeking to harness the full potential of their Honeywell TH6320R1004 thermostat․ Installing and using the Honeywell TH6320R1004 thermostat is a straightforward process that enhances home comfort and energy efficiency․ With clear instructions from the manual, users can confidently set up and customize their thermostat to meet specific needs․ The device’s intuitive interface and advanced features, such as programmable scheduling and remote control, make it easy to maintain a comfortable environment while saving energy․ Proper installation ensures reliable performance, and regular maintenance, like cleaning and battery replacement, extends its longevity․ By following the manual’s guidance, users can fully utilize the thermostat’s capabilities, enjoying precise temperature control and long-term satisfaction․ This thermostat is an excellent choice for anyone seeking a user-friendly and efficient HVAC solution․3․1 Pre-Installation Requirements
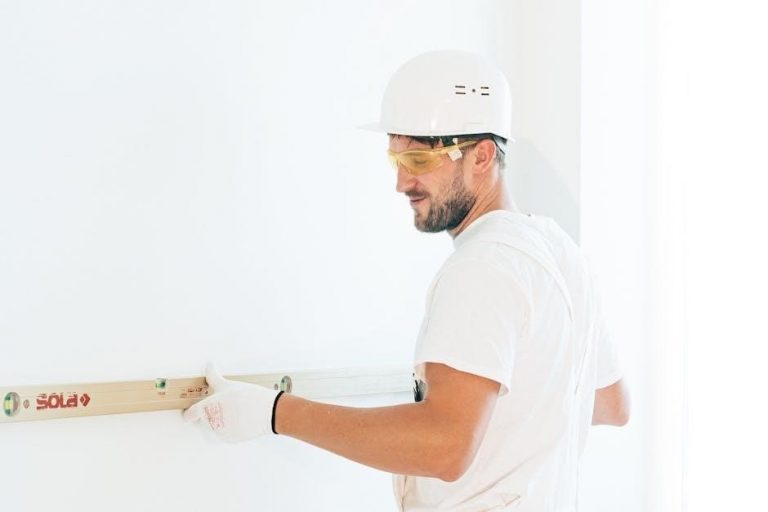
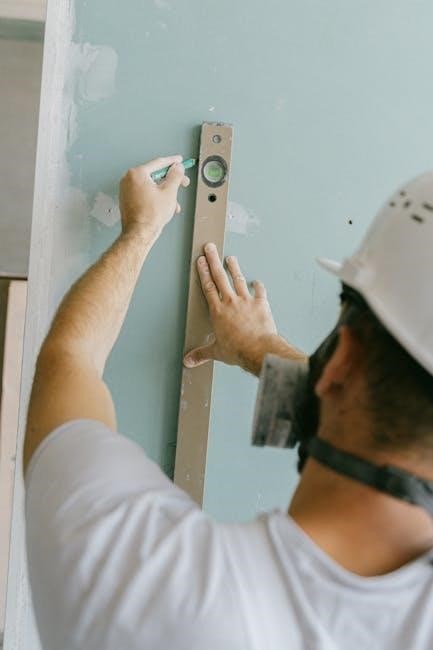
3․2 Mounting the Thermostat
3․3 Wiring the Thermostat
3․4 Final Installation Checks
Programming the Thermostat
4․1 Setting the Time and Date
4․2 Scheduling Temperature Adjustments
4․3 Understanding Programming Options

Advanced Features
5․1 Remote Control Setup and Pairing
5․2 Zone Control for Multiple Rooms
5․3 Energy-Saving Features
Troubleshooting
6․1 Common Issues and Solutions
6․2 Error Codes and Their Meanings
6․3 Resetting the Thermostat

Maintenance Tips
7․1 Cleaning the Thermostat
7․2 Replacing Batteries
7․3 Updating Software
Warranty Information
8․1 Warranty Coverage Details
8․2 Registering Your Product
9․1 Summary of Key Points
9․2 Final Thoughts on Installation and Use