
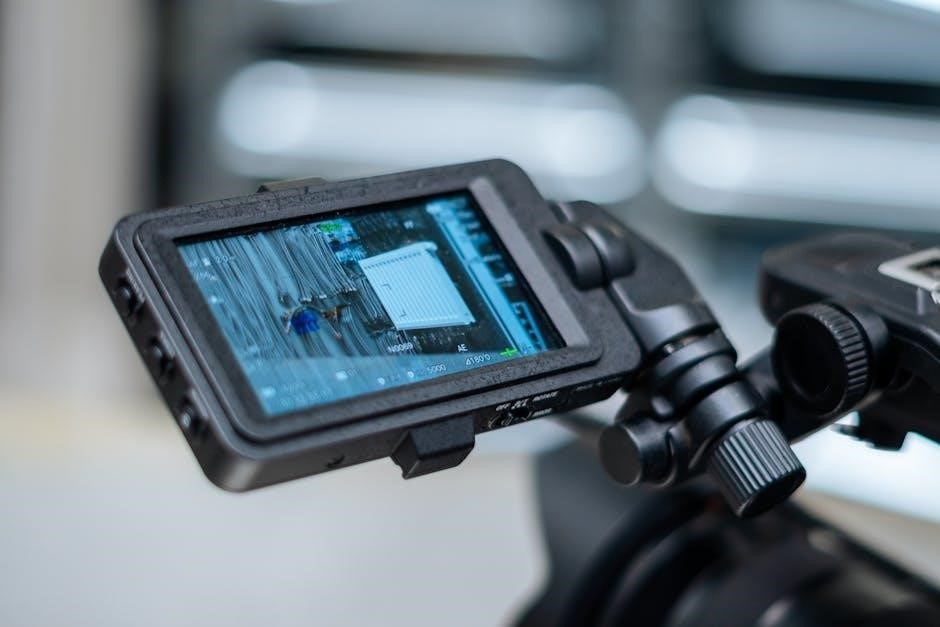
An e-bike LCD display serves as the central interface, providing real-time data like speed, battery level, and pedal assistance. It enhances your riding experience by offering essential information and control options, ensuring safety and efficiency on the go.
1.1 Importance of the LCD Display
The LCD display is a vital component of your e-bike, acting as a central interface for monitoring and controlling key functions. It provides real-time data such as speed, battery level, and pedal assistance mode, enabling informed decisions during your ride. The display also offers customization options, allowing you to tailor settings to your preferences. Additionally, it serves as a troubleshooting tool, helping identify issues and ensuring optimal performance. A functional LCD display enhances safety, efficiency, and overall riding satisfaction, making it indispensable for modern e-bike users.
1.2 Brief Overview of E-Bike Technology
E-bike technology integrates a motor, battery, controller, and sensors to provide pedal assistance and enhance riding efficiency. The LCD display acts as the central interface, showing real-time data like speed, battery level, and assistance mode. Modern systems offer customizable settings, such as power levels and speed limits, to tailor the ride experience. Sensors monitor pedal input and motor performance, ensuring smooth operation. This technology not only improves mobility but also makes riding more enjoyable and accessible for a wide range of users;

Understanding Your LCD Display
Your e-bike LCD display provides real-time data like speed, battery level, and assistance mode, serving as a crucial interface to monitor and control your ride efficiently.
2.1 Key Components of the Display
The LCD display features a screen showing real-time data, control buttons for navigation, and a power button to turn it on/off. It includes battery level and assist mode indicators, along with a speedometer and trip distance display. Some models offer additional features like a clock or motor temperature monitoring, enhancing functionality and rider convenience. These components work together to provide a user-friendly interface for monitoring and controlling your e-bike’s performance.
2.2 Interpreting Display Readings
Understanding the LCD display readings is crucial for optimizing your e-bike experience. The screen shows key metrics like battery level, current speed, and pedal assistance mode. Icons or numerical values indicate these readings, ensuring you stay informed. Some displays also show trip distance, odometer, and motor temperature. Error codes may appear if issues arise, prompting you to check connections or settings. Familiarizing yourself with these readings helps you monitor performance, conserve battery life, and maintain control during your ride;
Turning the Display On and Off
Locate the power button on the control panel. Press it briefly to turn the display on and press and hold it for a few seconds to turn it off.
3.1 Locating the Power Button
The power button is typically situated on the control panel near the handlebars for easy access. It may be labeled with a power icon or marked clearly. Ensure it’s within reach while riding to conveniently turn the display on or off without compromising safety. Check your e-bike’s manual if the button’s location isn’t immediately obvious, as designs can vary between models and brands.
3.2 Powering Up and Down Procedures
To power on the LCD display, press and hold the power button for a few seconds until the screen lights up. The same process applies to turning it off. Regular cleaning with a soft cloth and mild soap solution helps maintain screen clarity and functionality. Avoid harsh chemicals to prevent damage. Always ensure the display is dry before powering up to prevent short circuits. Proper care extends the lifespan of your e-bike’s LCD display.
Essential Features of the LCD Display
An e-bike LCD display offers essential features like real-time speed tracking, battery level monitoring, and pedal assistance mode selection. It also provides trip distance, odometer, and customizable settings for enhanced riding control and personalization.
4.1 Speedometer and Trip Distance
The speedometer on your e-bike LCD display shows your current speed, helping you maintain safe limits. The trip distance feature tracks your ride length, while the odometer logs total miles. These tools allow you to monitor your progress and plan routes efficiently. Advanced displays may include average speed and max speed reached. Use this data to optimize your riding experience and ensure your e-bike performs at its best.
4.2 Battery Level Indicator
The battery level indicator on your e-bike LCD display provides a clear visual of remaining charge, often shown as a percentage or icon. It helps you plan rides and avoid running out of power. Some displays also estimate range based on current settings, ensuring you stay informed about your e-bike’s energy status. Monitor this indicator to manage your battery effectively and enjoy uninterrupted adventures.
4.3 Pedal Assistance Modes
Pedal assistance modes on your e-bike LCD display allow you to customize the level of motor support. Typically, there are multiple levels, from low to high, offering varying degrees of assistance. Higher levels provide more power for challenging terrain, while lower levels conserve battery life and offer a more traditional cycling feel. Adjusting these modes is usually done via up and down buttons, giving you control over your riding experience. This feature ensures you can tailor your ride to suit your energy needs and terrain conditions effectively.

Wiring the LCD Display
Wiring your e-bike LCD display involves connecting it to the controller using specific wires. Ensure all connections are secure to avoid malfunctions. Use a soldering iron for reliability and heat shrink tubing to protect connections. Proper wiring ensures accurate data display and smooth functionality of your e-bike’s electrical systems. Always refer to your manual for precise wiring diagrams and instructions tailored to your model.
5.1 Tools and Materials Needed
To wire your e-bike LCD display, you will need specific tools and materials. These include the LCD display itself, the e-bike controller, high-quality wires, a soldering iron, heat shrink tubing, screwdrivers, and wire strippers. Additional materials like electrical tape and a multimeter can be helpful for testing connections. Ensure all components are compatible with your e-bike model for proper functionality. Always refer to your display or controller manual for specific requirements and recommendations to avoid damage or malfunctions.
5.2 Step-by-Step Wiring Instructions
Start by connecting the positive (VCC) wire from the LCD display to the controller’s power output. Next, link the ground (K) wire to the controller’s ground terminal. Connect the speed sensor wire to the appropriate port on both the display and controller. Use heat shrink tubing to insulate all connections. Secure the wires with zip ties to prevent damage. Finally, power on the system and test all readings to ensure proper functionality. Refer to your specific model’s manual for precise wiring diagrams and instructions.

Adjusting Display Settings
Access the menu via the control buttons to adjust brightness, contrast, and assistance levels. Customize settings for optimal visibility and ride comfort.
6.1 Customizing Assistance Levels
Customizing assistance levels on your e-bike LCD display allows you to tailor the motor support to your riding style. Use the up and down buttons to adjust the level, with higher settings providing more power for hills and lower settings conserving battery life. The display will show the selected mode, enabling real-time adjustments. Most models offer 3-5 levels, but advanced displays may allow fine-tuning of torque or speed limits. Experiment with settings to find the perfect balance between effort and assistance for your ride.
6.2 Modifying Brightness and Contrast
Adjusting the brightness and contrast on your e-bike LCD display ensures optimal visibility in various lighting conditions. Access the settings menu using the control buttons, often labeled as “i” or “+” and “-“. Navigate to the display settings and use the buttons to increase or decrease brightness and contrast. This feature helps reduce glare in direct sunlight and improves readability in low light. Some models may require specific button combinations, so consult your manual for exact instructions to customize the display for your preferences.

Maintenance and Care Tips
Regularly clean the LCD display with a soft, lint-free cloth and mild soap solution to prevent scratches and damage. Avoid harsh chemicals and extreme temperatures to ensure longevity and clarity.
7.1 Cleaning the Display Safely
To clean your e-bike LCD display, use a soft, lint-free cloth to gently wipe away dirt and smudges. Avoid harsh chemicals, abrasive materials, or excessive moisture, as they can damage the screen. For tougher smudges, dampen the cloth with a mild soap solution, but ensure it is thoroughly wrung out to prevent water spots. Regular cleaning extends the display’s lifespan and maintains visibility. Always refer to your specific model’s manual for any additional cleaning recommendations.
7.2 Protecting from Environmental Factors
Protect your e-bike LCD display from environmental factors like moisture, extreme temperatures, and UV exposure. Avoid exposing it to heavy rain or humidity, as this can damage internal components. Store your e-bike in a cool, dry place when not in use. Use a protective cover to shield the display from dust and direct sunlight. Regular inspections can help identify potential issues early. For added protection, consider applying a screen protector designed for outdoor use. Always follow the manufacturer’s guidelines for environmental care to ensure longevity.
Troubleshooting Common Issues
Common issues include unresponsive screens and incorrect readings. Check connections, power cycle, and reset. Inspect for damage and update software if necessary for optimal function.
8.1 Diagnosing Display Problems
Diagnosing LCD issues starts with checking connections between the display and controller. Ensure all wires are secure and not damaged. Power cycling the system by turning it off and on can often resolve software glitches. If the display remains unresponsive, inspect for physical damage or moisture exposure. Additionally, checking for error codes can help identify specific faults, such as communication errors between the display and the motor controller. Regularly updating the display’s software may also prevent or fix recurring issues.
8.2 Basic Reset and Power Cycling
To reset your e-bike LCD display, start by turning it off using the power button. Wait for 10-15 seconds before turning it back on, allowing the system to fully restart. For a basic reset, press and hold the UP and DOWN buttons simultaneously for 5-10 seconds until the display restarts. This process won’t erase saved settings but will reboot the system. If issues persist, consult your manual for model-specific reset procedures. Power cycling and resets often resolve software-related glitches without affecting customization.

Advanced Features and Functions
Advanced e-bike LCD displays offer features like navigation, motor temperature monitoring, and customizable settings, enhancing your ride with real-time insights and improved control over your e-bike’s performance.
9.1 Navigational Assistance and Clock
Modern e-bike LCD displays often include built-in navigational features, providing turn-by-turn directions for seamless route planning. A digital clock ensures you stay punctual, while some models offer trip time tracking. This feature-rich interface enhances your riding experience by keeping you informed and on course. Whether commuting or exploring new trails, these tools make every journey more efficient and enjoyable, integrating seamlessly with other display functions for a comprehensive cycling solution.
9.2 Motor Temperature Monitoring
Advanced e-bike LCD displays often feature motor temperature monitoring, ensuring optimal performance and preventing overheating. After a few seconds in riding mode, the display automatically switches to show motor temperature, allowing riders to adjust their pace. This feature helps maintain motor efficiency, prevent damage, and extend the lifespan of your e-bike. By keeping an eye on temperature levels, you can ensure smooth, reliable operation during your rides.
Upgrading Your LCD Display
Upgrading your e-bike LCD display can enhance functionality and performance. Ensure compatibility with your e-bike model and follow installation guidelines for a seamless integration and improved riding experience.
10.1 Choosing the Right Upgrade
Selecting the right LCD upgrade involves assessing your e-bike’s compatibility and specific needs; Consider display size, resolution, and additional features like navigation or temperature monitoring. Ensure the new display supports your e-bike’s motor and battery systems. Research reviews and manufacturer specifications to confirm compatibility. Upgrading to a color LCD or touchscreen can offer enhanced visibility and user-friendly controls. Compatibility with your e-bike’s existing wiring and software is crucial for seamless integration and optimal performance.
10.2 Installation Considerations
Installing an upgraded LCD display requires careful planning to ensure compatibility and safety. Begin by disconnecting the e-bike’s battery to prevent electrical hazards. Use appropriate tools like screwdrivers and soldering irons for wiring connections. Verify that the new display’s wiring harness aligns with your e-bike’s controller. Follow the manufacturer’s installation guide to avoid damaging components. Test the display after installation to ensure proper functionality. Always prioritize safety and compatibility to maintain your e-bike’s performance and reliability.
Understanding and maintaining your e-bike LCD display enhances your riding experience. Regular updates and proper care ensure optimal performance, while future advancements promise even smarter, more intuitive designs.
11.1 Maximizing Your E-Bike Experience
Your e-bike LCD display is a key interface for enhancing your riding experience. By monitoring speed, battery levels, and adjusting pedal assistance, you can optimize performance and safety. Customize settings like brightness and assistance levels to suit your preferences, ensuring a seamless ride. Regularly check maintenance alerts to prolong your e-bike’s lifespan. With these tools, you can tailor your journey to your unique needs, making every ride efficient and enjoyable. The LCD display is your gateway to unlocking your e-bike’s full potential.
11.2 Future of E-Bike Technology
The future of e-bike technology promises advanced LCD displays with color screens, integrated navigation, and smartphone app connectivity. Expect enhanced real-time data tracking, predictive maintenance alerts, and energy-efficient systems. Upcoming displays may feature customizable dashboards, voice command integration, and augmented reality overlays for a more immersive ride. These innovations will make e-bikes more user-friendly, durable, and environmentally efficient, shaping a smarter and more connected cycling experience for riders worldwide.