
Welcome to the world of jewelry box plans in PDF format! These detailed guides offer step-by-step instructions, material lists, and expert tips to help you create stunning jewelry boxes. Whether you’re a beginner or an experienced woodworker, PDF plans provide clarity and precision to ensure your project turns out perfectly. Discover how to craft beautiful, functional jewelry boxes with ease using these comprehensive resources.
1.1 Understanding the Basics of Jewelry Box Plans
Understanding the basics of jewelry box plans is essential for creating a well-structured and functional design. These plans typically include detailed diagrams, measurements, and step-by-step instructions to guide you through the construction process. Whether you’re a beginner or an experienced crafter, these plans help you grasp fundamental concepts like box dimensions, lid mechanisms, and compartment layouts. They also outline the necessary tools and materials, ensuring a smooth and organized approach to building your jewelry box. Starting with the basics ensures a strong foundation for your project.
1.2 Importance of Using PDF Plans for Jewelry Boxes
Using PDF plans for jewelry boxes offers numerous advantages, including portability and ease of access. These files are often downloadable, allowing you to view and print them anytime. PDF plans provide clear, high-resolution diagrams and instructions, ensuring accuracy in measurements and construction. They also enable zooming in for details, making complex designs more manageable. Additionally, PDFs are widely available from sources like Rockler and Woodcraft, offering both free and paid options. This format is ideal for woodworking projects, as it combines convenience with precision, helping you achieve professional results.

Materials Needed for Jewelry Box Construction
High-quality woods like mahogany, walnut, and cherry are ideal for jewelry boxes. Hardware such as hinges, locks, and handles are essential. Adhesives and finishes ensure durability and a polished look.
2.1 Types of Wood Suitable for Jewelry Boxes
For jewelry boxes, woods like mahogany, walnut, and cherry are popular due to their durability and attractive grain patterns. Maple offers a lighter, smoother finish, while ebony provides a luxurious, dark appearance. Exotic woods like rosewood and bubinga add unique beauty. When selecting wood, consider workability, stability, and how well it accepts finishes. Properly seasoned wood ensures minimal warping over time. Always choose high-quality, figured, or sustainably sourced wood to create a jewelry box that is both functional and visually stunning, ensuring a professional and polished final product.
2.2 Hardware Requirements (Hinges, Locks, Handles)
Choosing the right hardware is crucial for a functional and elegant jewelry box. Small hinges, such as brass or nickel-plated, ensure smooth lid movement. Magnetic locks or miniature latches provide secure closure. Handles or knobs should be durable and stylish, complementing the box’s design. Decorative or recessed handles can enhance the overall aesthetic. Ensure hardware is proportionate to the box size and aligns with its theme. Proper installation of hinges and locks is essential for longevity and ease of use, making the jewelry box both practical and visually appealing.
2.3 Adhesives and Finishes for a Polished Look
Achieve a professional finish by selecting the right adhesives and finishes. Wood glue is ideal for bonding pieces securely, while epoxy resin can add durability. Sand surfaces with fine-grit sandpaper for smoothness. Apply varnishes, polyurethane, or natural oils to protect the wood and enhance its grain. Wax or polish can add a final glossy touch. Proper drying times and thin application layers ensure a flawless result. These steps guarantee a polished, long-lasting jewelry box that exudes craftsmanship and elegance.
Tools Required for Building a Jewelry Box
Essential tools include saws, sanders, and drills for cutting and shaping wood. Advanced tools like jigs and routers can add intricate details. Gather your toolkit to start crafting!

3.1 Essential Woodworking Tools (Saws, Sanders, Drills)
Building a jewelry box requires basic woodworking tools like saws for cutting wood, sanders for smoothing surfaces, and drills for creating holes. A table saw or handheld saw can be used for precise cuts, while sanders ensure a polished finish. Drills are essential for drilling holes for hinges or locks. These tools are fundamental for preparing and assembling the box. Ensure they are sharp and well-maintained for accurate results. Having these tools ready will streamline your jewelry box construction process.
3.2 Advanced Tools for Detailed Work (Jigs, Routers)
For intricate designs and precision, advanced tools like jigs and routers are indispensable. Jigs help create consistent joints and cuts, ensuring accuracy in complex projects. Routers are ideal for profiling edges, carving patterns, or creating decorative inlays. These tools allow for detailed craftsmanship, enabling features like dovetail joints or ornate trim. While essential for advanced jewelry box designs, they require practice to master. Incorporating jigs and routers can elevate your project, adding professional-grade details to your custom jewelry box.
Design Considerations for Jewelry Boxes
Designing a jewelry box involves balancing size, shape, and functionality. Consider compartments, drawers, and decorative elements like carvings or inlays to enhance both utility and aesthetics, ensuring a timeless appeal.
4.1 Choosing the Right Size and Shape
Selecting the appropriate size and shape for your jewelry box is crucial for functionality and aesthetics. Consider the user’s needs, such as storing earrings, rings, or necklaces, and the available materials. A rectangular box with dimensions like 12-3/4″ width, 6-3/4″ depth, and 4-3/8″ height is a popular choice. Alternatively, curved or rounded shapes can add elegance. Ensure the design aligns with the intended use and personal style, balancing practicality with visual appeal for a timeless piece.
4.2 Incorporating Drawers, Trays, and Compartments
Incorporating drawers, trays, and compartments into your jewelry box enhances functionality and organization. Use small drawers for earrings or rings and trays for necklaces. Adjustable compartments allow customization to fit different jewelry types. Consider adding a tray with separate sections for rings and earrings. This design ensures each piece has its place, reducing clutter. The overall functionality and elegant appearance make the box more appealing. Jewelry box plans provide detailed guidance on integrating these elements seamlessly, making your project both practical and visually appealing.
4;3 Adding Decorative Elements (Carvings, Inlays)
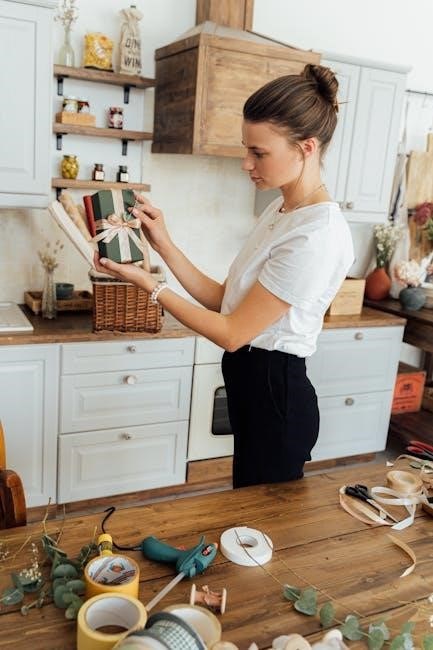
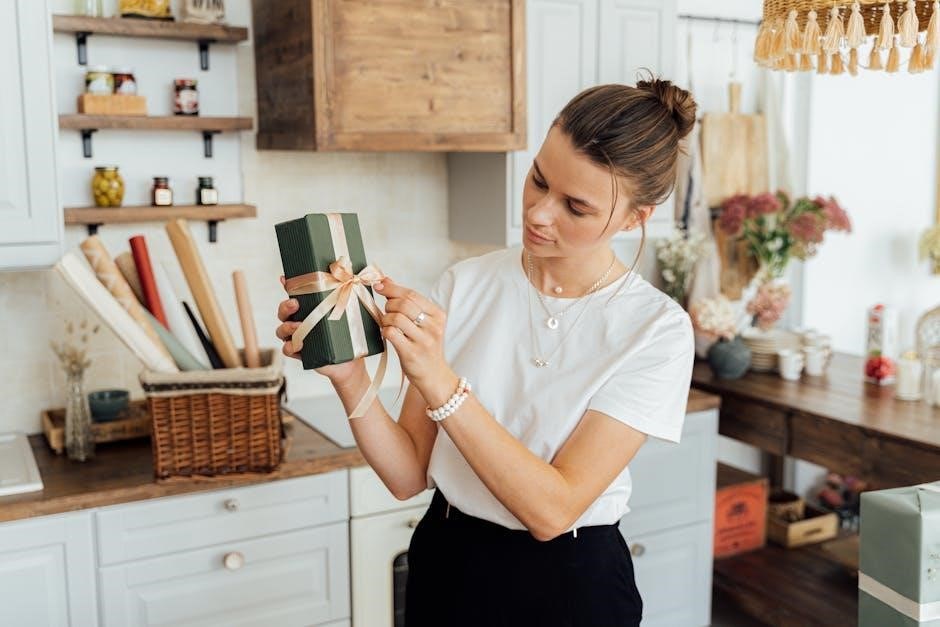
Enhance your jewelry box with decorative elements like carvings or inlays to add elegance and personal flair. Intricate carvings can create unique patterns, while inlays, such as wood or metal, provide contrast and sophistication. These details make the box a true heirloom. Use laser cutting for precise designs or traditional tools for a handmade touch. Jewelry box plans often include templates and tips for mastering these techniques, ensuring your project stands out with a polished, artistic finish that reflects your creativity and skill.

Step-by-Step Construction Guide
Learn to build a jewelry box with clear, step-by-step instructions. From cutting pieces to assembling the box, installing hinges, and adding compartments, these guides ensure a flawless project.
5.1 Preparing the Wood and Cutting Pieces
Start by selecting high-quality wood that matches your design. Measure and mark the wood according to your plan, ensuring precise cuts for each component. Use a saw or CNC machine for accurate cuts, and sand edges to smooth them out. Organize the pieces to ensure all parts fit together seamlessly. This step is crucial for achieving a professional finish and proper assembly. Proper preparation ensures the project flows smoothly and the final product meets your expectations.
5.2 Assembling the Box and Lid
Begin by assembling the box structure using wood glue and clamps, ensuring all sides align perfectly. Attach the bottom panel first, then carefully fit the sides and back. Once the base is secure, add the front panel and any additional supports. For the lid, use small hinges to create a seamless opening mechanism. Clamp the pieces together and let the glue dry completely before proceeding. This step requires precision to ensure the box and lid fit together smoothly and function as intended.
5.3 Installing Hinges and Locks
Begin by attaching small hinges to the lid and box, ensuring precise alignment for smooth movement. Use a drill bit to create pilot holes for screws, then securely fasten the hinges. Next, install a lock or latch to ensure the box closes tightly. Position the lock mechanism carefully, aligning it with the hinge pins for proper functionality. Test the lid’s opening and closing to confirm smooth operation. This step adds both functionality and security to your jewelry box, making it ready for use.
5.4 Adding Internal Compartments and Trays
Start by measuring and cutting thin wood pieces to fit inside the box as compartments. Assemble these using adhesive and clamps, ensuring a snug fit. For trays, attach small handles and secure them with hinges for easy access. Consider adding velvet or soft lining to protect jewelry. Optionally, incorporate drawer slides for smooth tray operation. This step enhances the functionality of your jewelry box, allowing for organized storage of various accessories. Proper alignment and secure fitting are key to a polished finish;

Finishing and Decorating the Jewelry Box
Finishing involves sanding for a smooth surface, applying stain or varnish for color and protection, and adding decorative elements like engravings or inlays for a personalized touch.
6.1 Sanding and Smoothing the Surface
Sanding is a crucial step in achieving a polished finish. Start with medium-grit sandpaper (120-150 grit) to smooth the wood, then progress to finer grits (220-240) for a silky surface. Always sand in the direction of the wood grain to avoid scratches. Use an orbital sander for large areas and hand-sand intricate details. After sanding, wipe away dust with a tack cloth or vacuum to ensure a clean surface for staining or varnishing. Proper sanding ensures a professional-quality finish for your jewelry box.
6.2 Applying Stains, Varnishes, or Paints
Applying stains, varnishes, or paints enhances the beauty and protects the jewelry box. Start by ensuring the surface is sanded and dust-free. Use a foam brush or cloth to apply stain or varnish evenly, following the wood grain. For paint, apply thin coats with a high-quality brush, allowing each layer to dry. Water-based finishes dry faster, while oil-based options offer durability. Always test colors on scrap wood first. Allow the final coat to cure fully before handling to achieve a professional, long-lasting finish.
6.3 Adding Final Decorative Touches
Add the perfect finishing flair to your jewelry box with decorative elements. Consider engraving names, patterns, or designs for a personal touch. Inlays or carvings can elevate the box’s elegance. For a modern look, apply metal accents or hardware with intricate details. Use high-quality materials like gold leaf or rare woods to enhance sophistication. Finally, ensure all elements are securely attached and aligned for a polished appearance. These touches transform a simple box into a unique, cherished piece of craftsmanship.
Advanced Techniques for Custom Jewelry Boxes
- Laser cutting creates intricate designs for unique patterns.
- Multi-layered boxes add complexity and storage options.
- Incorporate electronics for lighting or secure locks.
7.1 Creating Intricate Designs with Laser Cutting
Laser cutting is a cutting-edge technique for adding intricate designs to jewelry boxes. It allows for precise patterns, such as floral motifs or geometric shapes, that enhance the box’s aesthetic appeal. This method is particularly useful for creating complex designs that would be difficult to achieve by hand. Various materials, including wood and metal, can be cut with high accuracy, ensuring a professional finish. Laser-cut designs are ideal for customizing jewelry boxes, making them truly unique and personalized. This technique is a game-changer for woodworkers aiming to elevate their craftsmanship.
7.2 Building Multi-Layered or Tiered Boxes
Multi-layered or tiered jewelry boxes offer a sophisticated way to organize and display treasures. These designs feature stacked compartments, each serving a specific purpose, such as separating rings, earrings, or necklaces. Using diverse woods and finishes, you can create a visually appealing contrast between layers. PDF plans often include detailed instructions for aligning and attaching tiers seamlessly. This approach not only enhances functionality but also adds a touch of elegance, making tiered boxes a standout piece in any collection. Perfect for gift-giving or personal use, they showcase craftsmanship and attention to detail.
7.3 Incorporating Electronic Locks or Lighting
Incorporating electronic locks or lighting into your jewelry box adds a modern twist to traditional designs. Electronic locks provide enhanced security, while lighting showcases your treasures elegantly. PDF plans often include step-by-step guidance for wiring and installing these features; LED lights can be placed inside compartments to highlight jewelry, and electronic locks ensure valuables are protected. These advanced elements blend functionality with sophistication, making your jewelry box both practical and visually stunning. Perfect for those seeking a contemporary, high-tech touch in their craftsmanship.
Safety Tips and Best Practices
Always wear safety glasses and keep loose clothing tied back when using power tools. Ensure proper ventilation when working with adhesives or finishes to avoid health risks.
8.1 Working Safely with Power Tools
Always wear safety glasses and ensure proper ventilation when using power tools. Keep loose clothing and long hair tied back to avoid accidents. Maintain a clean workspace to prevent slips and trips. Regularly inspect tools for damage and ensure they are properly maintained. Use push sticks or other safety devices when working with table saws or sanders. Avoid wearing jewelry that could get caught in machinery. Keep children and pets away from the work area. Follow manufacturer guidelines for tool operation and never overreach while cutting or drilling.
8.2 Avoiding Common Mistakes in Jewelry Box Construction

Measure carefully to avoid cutting wood incorrectly, as this can ruin the project. Ensure proper alignment of hinges and locks for smooth operation. Avoid rushing the assembly process, as this can lead to misaligned parts. Use the right type of wood and hardware to maintain durability and aesthetics. Double-check the fit of drawers and trays before final assembly. Don’t skip sanding, as it ensures a polished finish. Apply stain or varnish evenly to avoid uneven color. Let finishes dry completely to prevent damage. Plan ahead for compartments to maximize space efficiently.
Troubleshooting Common Issues
Address uneven lids by adjusting hinges or sanding surfaces. Fix scratches or dents in the finish by lightly sanding and reapplying varnish or stain evenly.
9.1 Fixing Uneven Lids or Misaligned Hinges
Uneven lids or misaligned hinges can be corrected by adjusting the hinge screws or sanding the lid’s edges for proper alignment. Ensure the box is clamped firmly while testing the lid’s movement. If hinges are loose, tighten them; if misaligned, remove and reposition them. Sanding the surface lightly can also help achieve a smooth fit. Always test the lid’s functionality before finalizing the box. Proper alignment ensures a polished and professional finish, enhancing the overall appearance of your jewelry box.
9.2 Repairing Scratches or Dents in the Finish
Minor scratches or dents in the finish can be repaired by lightly sanding the area with fine-grit sandpaper. Apply a small amount of wood stain or varnish to blend the repair with the surrounding surface. For deeper scratches, fill the area with a wood filler, let it dry, and sand smooth before refinishing. Protect the repaired area with a clear topcoat to restore the box’s polished look. Regular maintenance and careful handling can prevent future damage, ensuring your jewelry box remains pristine.
Creative Ideas for Personalizing Jewelry Boxes
Personalize your jewelry box with engravings, exotic woods, or intricate designs. Add unique touches like carvings, inlays, or custom patterns to make it truly special and meaningful.
10.1 Engraving Names or Designs
Engraving names, dates, or meaningful symbols adds a personal touch to your jewelry box. Use a router or laser cutter for intricate designs, making it a unique and heartfelt gift. This technique allows you to customize the box with personal messages or patterns, creating a one-of-a-kind piece. Whether it’s a special occasion or a thoughtful gesture, engraving transforms the box into a cherished keepsake. It’s a simple yet impactful way to make your jewelry box truly special and memorable.
10.2 Using Exotic Woods or Rare Materials
Incorporating exotic woods or rare materials elevates your jewelry box to a luxurious, one-of-a-kind piece. Woods like ebony, mahogany, or burlwood add unique grain patterns and textures, while materials like metal or crystal offer modern elegance. These elements make the box stand out and reflect personal style. Consider using figured wood for intricate designs or combining materials for a striking contrast. While sourcing rare materials may require effort, the result is a truly exclusive and sophisticated jewelry box that showcases craftsmanship and creativity.
Resources for Jewelry Box Plans PDF
Find extensive collections of jewelry box plans in PDF format, featuring both free and paid options, from trusted sources like Rockler Woodworking and Popular Woodworking.
11.1 Free Downloadable Plans from Reliable Sources
Access a variety of free downloadable jewelry box plans from trusted websites like FixThisBuildThat and Popular Woodworking. These PDF guides offer detailed instructions, material lists, and diagrams to help you craft beautiful jewelry boxes. From simple DIY projects to intricate designs, these plans cater to all skill levels. Many include step-by-step tutorials, ensuring a smooth building process. Perfect for beginners or experienced woodworkers, these free resources provide everything needed to create stunning jewelry boxes with ease and precision.
11.2 Paid Plans with Detailed Instructions
Paid jewelry box plans offer comprehensive guides with advanced features and precise instructions. Rockler Woodworking and Hardware provides heirloom designs with detailed material lists and construction tips. Woodcraft Magazine offers downloadable plans, such as their Jewelry/Keepsake Box, complete with exact dimensions and expert advice. These premium resources are ideal for craftsmen seeking intricate details and professional finishes, ensuring high-quality results for custom jewelry boxes with unique designs and functionality.
With comprehensive guides and detailed plans, crafting a stunning jewelry box is achievable for all skill levels. Start your project today and create something truly special!
12.1 Final Thoughts on Building a Jewelry Box
Building a jewelry box is a rewarding project that combines creativity with practical skills. Whether you’re a novice or an experienced woodworker, the process offers a sense of accomplishment. Patience and attention to detail are key to achieving a polished result. With the right materials and tools, you can craft a piece that reflects personal style and serves as a lasting treasure. Embrace the journey, and enjoy the satisfaction of creating something truly special for yourself or as a cherished gift.
12.2 Encouragement to Start Your Project
Don’t hesitate to begin your jewelry box project! With clear PDF plans and step-by-step guides, you’ll find the process rewarding and enjoyable. Whether you’re crafting for yourself or as a thoughtful gift, the satisfaction of creating something handmade is unparalleled. Embrace your creativity, gather your tools, and dive into this exciting endeavor. Remember, every project starts with a single step—so take that first cut with confidence and enthusiasm. Your unique jewelry box is waiting to come to life!