
The Miller Maxstar 210 Manual provides a comprehensive guide for safe and effective operation of the welder, covering its features, setup, and troubleshooting procedures in detail.
1.1 Overview of the Miller Maxstar 210 Welder
The Miller Maxstar 210 is a portable and versatile DC TIG/Stick welder designed for precision and durability. It offers 10 programmable settings for custom welding profiles, ensuring adaptability across various projects. With a robust design, it supports both TIG and Stick welding processes, making it ideal for professionals and hobbyists alike. Its compact size and lightweight construction enhance portability, while advanced features like Auto-Line technology simplify operation. Built for reliability, the Maxstar 210 delivers consistent performance, catering to a wide range of welding needs in different environments.
1.2 Importance of the Manual for Safe and Effective Use
The Miller Maxstar 210 Manual is essential for ensuring safe and effective use of the welder. It outlines critical safety precautions, installation guidelines, and operational procedures, reducing the risk of accidents. The manual provides detailed instructions on setting up and maintaining the equipment, as well as troubleshooting common issues. By following the manual, users can optimize the welder’s performance, extend its lifespan, and ensure compliance with safety standards. Regular reference to the manual helps users maximize their welding experience and achieve professional-grade results consistently.

Safety Precautions
Adhering to safety guidelines in the Miller Maxstar 210 Manual is crucial to prevent accidents. Always wear appropriate PPE, including gloves and eye protection. Ensure proper electrical connections to avoid hazards.
2.1 General Safety Guidelines for Welding Operations
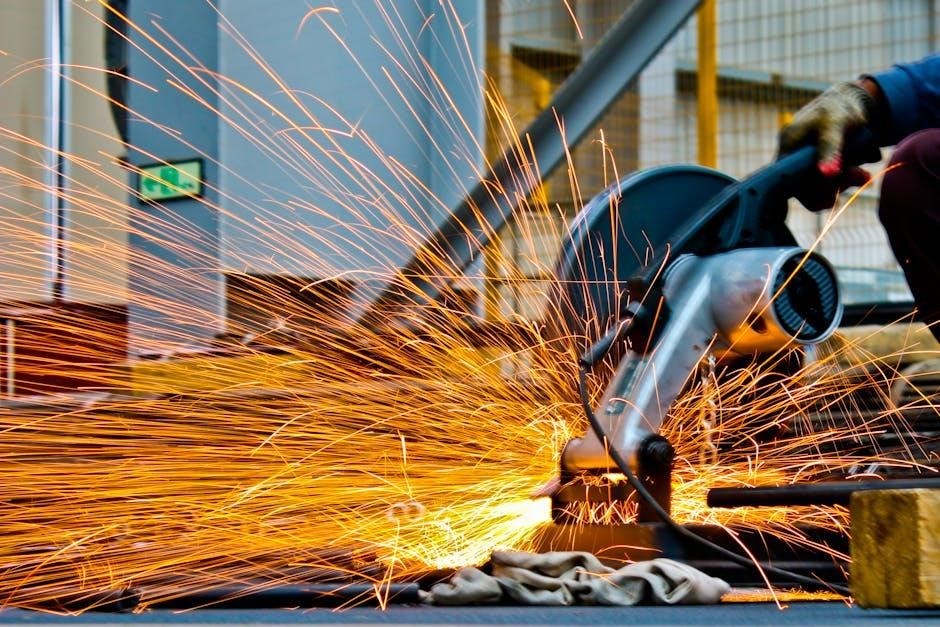
The Miller Maxstar 210 Manual emphasizes essential safety practices for welding operations. Always wear protective gear, including welding helmets with shaded lenses, gloves, and fire-resistant clothing. Ensure the work area is well-ventilated to prevent inhaling fumes. Keep flammable materials away from the welding zone. Properly ground the equipment to avoid electrical shocks. Never touch live electrical parts with bare hands. Familiarize yourself with emergency procedures, such as having a fire extinguisher nearby. Regularly inspect equipment for damage or wear. Following these guidelines ensures a safer working environment and minimizes risks associated with welding tasks. Compliance with these practices is vital for operator safety and equipment longevity.
2.2 Specific Safety Hazards Associated with the Maxstar 210
The Miller Maxstar 210 Manual highlights specific safety hazards unique to the unit. Electrical components can pose shock risks if improperly handled. The inverter technology, while efficient, requires careful installation to prevent circuit damage. High-frequency arcs can cause eye discomfort or burns without proper PPE. The unit’s portability means it may be used in various environments, increasing exposure to dust or moisture, which can affect performance and safety. Users must avoid overloading the machine, as it can lead to thermal overload and potential fire hazards. Adherence to the manual’s guidelines is crucial to mitigate these risks and ensure safe operation of the Maxstar 210 welder.
2.3 Precautions for Installation and Maintenance
Proper installation and maintenance of the Miller Maxstar 210 are crucial for safe operation. Ensure all electrical connections are secure and meet local codes to prevent shock or fire risks. Use clean, dry compressed air to cool the unit and avoid contamination. Regularly inspect and replace worn parts, such as the TIG torch and consumables, to maintain performance. Grounding must be done correctly to prevent electrical hazards. Always follow the manual’s maintenance schedule to extend the welder’s lifespan and ensure reliability. Improper installation or neglecting maintenance can lead to equipment failure or safety hazards, emphasizing the need for strict adherence to guidelines.

Installation and Setup
Proper installation of the Miller Maxstar 210 ensures optimal performance and safety. Follow manual guidelines for electrical connections, grounding, and equipment placement to meet safety standards and regulations.
3.1 Unpacking and Initial Inspection of the Welder
Begin by carefully opening the crate and inspecting the Miller Maxstar 210 for any visible damage. Verify all components are included, such as the welder, power source, TIG torch, cables, and manual. Conduct a thorough inspection of the unit, checking for dents, scratches, or bent parts. Ensure all connections and terminals are secure and free from damage. Test the functionality of switches, controls, and interfaces; Refer to the manual for specific details and guidelines. If any issues are found, contact Miller support immediately for assistance or replacement.
3.2 Proper Grounding and Electrical Connections
Ensure the Miller Maxstar 210 is properly grounded to prevent electrical hazards. Connect the grounding terminal to a suitable metallic surface, following local electrical codes. Verify the power source matches the welder’s voltage and amperage requirements. Use the correct gauge wire for connections to avoid overheating. Double-check all electrical connections for tightness and integrity. Refer to the manual for specific wiring diagrams and guidelines. Improper connections can lead to unsafe operating conditions, so adherence to these steps is critical for both safety and optimal performance of the welder.

Operating the Miller Maxstar 210
Mastering the operation involves understanding the control panel, setting up for TIG/Stick welding, and adjusting parameters for optimal performance while ensuring safety and efficiency in every weld.
4.1 Understanding the Control Panel and Interfaces
The Miller Maxstar 210 features an intuitive control panel designed for ease of use. The digital display provides clear visibility of welding parameters, while preset buttons simplify process customization. The interface includes a straightforward layout with adjustment knobs for amperage and voltage control. Additional features like programmable memory settings allow for quick recall of preferred welding configurations. The manual emphasizes the importance of familiarizing oneself with the control panel to ensure precise and efficient welding operations. Understanding these components is essential for maximizing the welder’s performance and achieving consistent, high-quality results across various welding tasks and materials. Proper operation begins with mastering the control panel.
4.2 Setting Up for TIG and Stick Welding Processes
Setting up the Miller Maxstar 210 for TIG and Stick welding involves selecting the appropriate mode on the control panel. For TIG welding, ensure the polarity is set to DC, and the tungsten electrode is properly grounded. Adjust the amperage and voltage according to the material thickness and type. For Stick welding, choose the correct electrode type and polarity (DC or AC) based on the electrode manufacturer’s recommendations. Always ensure the workpiece is clean and properly grounded. The manual provides detailed charts for parameter settings and safety checks to ensure optimal performance in both welding processes. Proper setup is crucial for achieving high-quality welds.
4.3 Adjusting Parameters for Optimal Welding Performance
Adjusting parameters on the Miller Maxstar 210 ensures precise control over welding output. For TIG welding, fine-tune the arc amplitude, pulse frequency, and background current to achieve desired weld penetration and appearance. In Stick mode, adjust the hot start and arc force settings to optimize electrode performance and reduce spatter. The manual provides guidance on how to tweak these settings based on material type and thickness. Experiment with parameter adjustments to find the ideal balance for your specific application, ensuring consistent and high-quality welds every time. Proper parameter setup enhances both efficiency and weld integrity.
4.4 Using Programmable Settings for Custom Welding Profiles
The Miller Maxstar 210 allows users to create and store custom welding profiles using its programmable settings. This feature enables welders to save specific parameters for repeatable results across different projects. Access the programmable memory through the control panel to store up to 10 unique profiles. Each profile can be tailored for specific materials or techniques, ensuring consistency and efficiency. For TIG welding, programmable settings include pulse frequency, amplitude, and background current. In Stick mode, customize arc characteristics and hot start intensity. This feature enhances productivity and reduces setup time, making it ideal for professionals who frequently switch between welding processes.
Maintenance and Troubleshooting
Regular maintenance ensures longevity and optimal performance of the Miller Maxstar 210. Clean the unit, check for wear, and address common issues promptly for reliable operation.
5.1 Routine Maintenance Tasks to Ensure Longevity
Regular maintenance is crucial for extending the life of the Miller Maxstar 210. Clean the unit thoroughly, removing dust and debris to prevent overheating. Inspect cables, connections, and electrodes for wear or damage. Lubricate moving parts as specified in the manual. Check for loose screws or components and tighten them. Ensure proper ventilation to avoid contamination. Store the welder in a dry, cool environment when not in use. Follow the recommended maintenance schedule to prevent unexpected downtime and ensure optimal performance.
5.2 Common Issues and Diagnostic Procedures
Common issues with the Miller Maxstar 210 include arc instability, faulty electrode connections, and power fluctuations. Diagnose by checking electrode condition, ensuring secure cable connections, and verifying input voltage. If the welder fails to power on, inspect the circuit breaker and fuses. For inconsistent weld quality, adjust parameters like voltage and current. Refer to the manual for troubleshooting charts or error codes. Regularly updating software and consulting Miller support can resolve complex issues, ensuring reliable operation and maintaining the welder’s performance over time.

Technical Specifications of the Miller Maxstar 210
The Miller Maxstar 210 features DC TIG and Stick welding capabilities, with a power output of 160A at 26.4V and a 60% duty cycle, ensuring efficient performance across various metals.
6.1 Power Output and Duty Cycle Ratings
The Miller Maxstar 210 delivers a maximum power output of 160A at 26.4V, ensuring consistent performance for both TIG and Stick welding processes. The welding machine is designed with a 60% duty cycle, which allows operators to perform continuous welding for longer periods without overheating. This robust design makes it suitable for industrial applications and heavy-duty projects. The power output and duty cycle ratings ensure optimal performance across various metal types, providing a reliable and efficient welding experience for professionals and enthusiasts alike.
6.2 Compatibility with Various Welding Processes
The Miller Maxstar 210 is a DC TIG/Stick welding machine, compatible with both TIG and Stick welding processes. It supports DC modes, making it ideal for welding steel, stainless steel, and other ferrous metals. The machine’s design ensures precise control over the welding arc, allowing for clean and high-quality welds. Its compatibility with various welding processes makes it a versatile tool for different applications, from thin sheet metal to thick plate welding. This adaptability enhances its utility in both industrial and workshop settings, catering to the needs of diverse welding projects.
6.3 Dimensions and Portability Features
The Miller Maxstar 210 is designed for portability, weighing approximately 34.5 lbs and measuring 24.8 inches in height, 14;5 inches in width, and 19.5 inches in depth. Its compact design and robust construction ensure easy transport to various job sites. The unit features a durable carrying handle, making it convenient for welders to move between locations. The Maxstar 210’s dimensions and lightweight build enhance its portability without compromising performance. Additionally, its Auto-Line technology allows for flexible power input, further increasing its versatility and suitability for different welding environments. These features make it an ideal choice for both professional and portable welding needs.
Accessories and Consumables
The Miller Maxstar 210 supports a range of accessories, including tungsten electrodes, welding torches, and consumables, ensuring optimal performance across various TIG and Stick welding applications.
7.1 Recommended Tungsten Electrodes and Consumables
For the Miller Maxstar 210, selecting the right tungsten electrodes is crucial for optimal welding performance. The manual recommends using high-quality, contamination-free electrodes, such as 2% thoriated tungsten for DC TIG welding. Clean gloves should be worn when handling tungsten to prevent contamination. Additionally, the machine supports various consumables, including collets, gas nozzles, and adapters. Regular maintenance of these components ensures consistent weld quality and extends the lifespan of the equipment. Always refer to the manual for specific recommendations on compatible consumables and proper installation procedures to maintain the welder’s efficiency and safety. Proper storage and handling are also emphasized.
7.2 Optional Accessories for Enhanced Welding Experience
The Miller Maxstar 210 offers optional accessories to enhance welding efficiency and comfort. These include a remote foot control for precise parameter adjustment, a water cooler for high-duty-cycle applications, and a TIG torch with adjustable amperage control. Additional accessories like a welding cart, extra power cables, and a shielding gas kit can improve portability and workspace organization. The manual highlights compatibility with various Miller-designed parts, ensuring seamless integration and optimal performance. These accessories are designed to cater to specific welding needs, providing users with a customized setup for their projects. Regularly updating with genuine Miller parts ensures reliability and longevity.

Comparison with Other Miller Welding Machines
The Miller Maxstar 210 stands out among other Miller models with its DC TIG/Stick capabilities, portability, and programmable settings, offering unique features for diverse welding needs and preferences.
8.1 Key Differences Between Maxstar 210 and Dynasty Series
The Miller Maxstar 210 and Dynasty series differ in power capabilities and welding processes. The Maxstar 210 is DC TIG/Stick capable, while the Dynasty series offers AC/DC TIG/Stick versatility, enabling aluminum welding. The Dynasty series boasts advanced features like adjustable pulse power and square wave AC output, which the Maxstar 210 lacks. Portability is a standout feature of the Maxstar 210, making it ideal for mobile use. In contrast, the Dynasty series excels in heavy-duty applications and multi-process welding, catering to professionals needing higher flexibility and performance for complex projects.
8.2 Unique Features of the Maxstar 210 Compared to Others
The Miller Maxstar 210 stands out with its portability and durability, featuring a robust design resistant to dust and harsh environments. It offers programmable settings, allowing users to store up to 10 custom welding profiles for quick access. The Auto-Line technology simplifies operation by adapting to various input voltages without manual adjustments. Additionally, its DC TIG/Stick capabilities and high-duty cycle make it suitable for demanding applications. These features, combined with Miller’s reputation for reliability, position the Maxstar 210 as a versatile choice for professionals seeking precision and efficiency in welding tasks across diverse industries and job sites.
The Miller Maxstar 210 Manual underscores the welder’s portability, durability, and advanced features, making it a top choice for professionals seeking efficiency and precision in diverse welding applications.
9.1 Summary of the Miller Maxstar 210 Manual
The Miller Maxstar 210 Manual serves as a detailed guide for users, covering installation, operation, maintenance, and troubleshooting. It emphasizes safety, proper setup, and optimal welding performance. The manual outlines technical specifications, compatible processes, and accessories, ensuring users maximize the welder’s capabilities. By following the manual, users can maintain equipment longevity and achieve professional-grade results. Its clear instructions and troubleshooting tips make it an indispensable resource for both novice and experienced welders, ensuring safe and efficient use of the Miller Maxstar 210.
9.2 Importance of Regular Use of the Manual for Optimal Performance
Regular use of the Miller Maxstar 210 Manual ensures safe and efficient operation, helping users achieve optimal welding results. It provides essential guidance for installation, maintenance, and troubleshooting, preventing potential issues. By following the manual, users can maximize the welder’s performance, extend its lifespan, and maintain consistent quality in their work. Regular consultation also helps users stay updated on best practices and safety protocols, ensuring compliance with industry standards. This habitual reliance on the manual fosters a professional approach, minimizing risks and enhancing overall productivity for both novice and experienced welders.
Additional Resources
Explore official Miller Electric websites for downloadable manuals, guides, and support. Visit www.millerwelds.com for detailed resources, FAQs, and contact information for technical assistance and service centers.
10.1 Where to Find the Miller Maxstar 210 Manual Online
The Miller Maxstar 210 Manual is readily available on the official Miller Electric website at www.millerwelds.com. Users can download the manual in PDF format, ensuring easy access to safety guidelines, operating instructions, and troubleshooting tips. Additionally, reputable third-party platforms like Welding Industries Australia (WIA) and select product listing pages may host the manual for convenience. Always verify the source for authenticity to ensure you receive the most accurate and updated version of the manual for optimal performance and safety.
10.2 Contact Information for Miller Support and Service Centers
For assistance with the Miller Maxstar 210, contact Miller Electric Mfg. Co. at their official website: www.millerwelds.com. Reach their support team via phone at 1-800-4-A-MILLER or email at support@millerwelds.com. International customers, including those in Australia, can contact regional offices listed on the website. Miller also provides authorized service centers globally, ensuring prompt support for warranty claims, repairs, and technical inquiries. Visit the site for a full list of service centers and to access resources like manuals and troubleshooting guides.