The Rival Ice Cream Freezer is a versatile and efficient appliance designed for making delicious homemade ice cream․ With its user-friendly design and robust features, it allows users to create customized frozen treats effortlessly․ Perfect for both beginners and experienced enthusiasts, this freezer ensures smooth and creamy results every time․
1․1 Overview of the Rival Ice Cream Freezer
The Rival Ice Cream Freezer is a high-quality appliance designed to make homemade ice cream effortlessly․ Available in various models like the FRRVBK02-BLU (2-Qt) and GC8101-WN (1 Quart), it offers versatility for different needs․ The freezer features a powerful motor, a durable construction, and a user-friendly interface․ Its polarized plug ensures safety, while the dispensing spout in some models adds convenience․ With the ability to churn up to 2 pounds of ice cream, it’s perfect for family use or small gatherings․ The appliance is also efficient, producing smooth and creamy results in minimal time․ Whether you’re a novice or an experienced user, the Rival Ice Cream Freezer provides an enjoyable and customizable ice cream-making experience․
1․2 Benefits of Using the Rival Ice Cream Freezer
The Rival Ice Cream Freezer offers numerous benefits for homemade ice cream enthusiasts․ Its efficient design ensures quick and consistent freezing, producing smooth and creamy results․ Users can customize flavors effortlessly, making it ideal for creative recipes․ The appliance is user-friendly, suitable for both beginners and experienced makers․ It also features a compact design, saving kitchen space while delivering high performance․ Additionally, the freezer includes safety features and durable construction for long-lasting use․ With minimal effort, you can enjoy professional-quality ice cream at home, making it a worthwhile investment for any dessert lover․ Its versatility and ease of operation make it a standout choice for crafting delicious frozen treats;
Essential Safety Precautions
The Rival Ice Cream Freezer features a polarized plug for user safety․ Always follow operational guidelines and avoid water spots by proper drying to ensure longevity and optimal performance․
2․1 Understanding the Polarized Plug
The Rival Ice Cream Freezer features a polarized plug, a critical safety component designed to reduce the risk of electrical shock․ This plug has one blade larger than the other, ensuring proper alignment when inserted into a standard outlet․ The polarized plug is a non-negotiable safety feature and should never be tampered with or bypassed․ If the plug does not fit securely into an outlet, do not force it, as this could result in electrical hazards․ Always use the freezer with a properly grounded outlet to maintain safety standards․ This design ensures user protection and prevents potential electrical issues during operation․ Never attempt to modify or remove the polarized plug, as it is essential for safe and efficient performance․
2․2 Important Safety Tips for Operation
When operating the Rival Ice Cream Freezer, ensure safety by following essential guidelines․ Always use the polarized plug as provided, and avoid using adapters or extensions․ Keep the appliance away from water sources to prevent electrical hazards․ Never touch moving parts or insert objects into the freezer while it is in operation․ Children should be supervised at all times when the freezer is running․ Ensure the area around the freezer is clear of clutter to avoid accidents․ Unplug the appliance during cleaning or when adding ingredients․ Avoid overloading the freezer, as this can damage the motor․ Always follow the recommended ingredient ratios to maintain performance and safety․
2․3 Precautions to Avoid Water Spots
To prevent water spots on the Rival Ice Cream Freezer, ensure it is thoroughly dried after cleaning․ Avoid letting the ice cream canister air dry, as this can lead to mineral deposits․ Regularly wiping down surfaces with a clean, dry cloth helps maintain its appearance․ Additionally, avoid using abrasive cleaners, as they may damage the finish․ For stubborn spots, a mild detergent and water solution can be used, but rinse and dry immediately afterward․ Proper storage in a dry location when not in use also prevents moisture buildup․ Following these steps will keep your freezer looking like new and functioning optimally․
Parts and Components of the Rival Ice Cream Freezer
The Rival Ice Cream Freezer includes a durable canister, a powerful motor, and an easy-to-use control panel․ These components work together seamlessly for optimal performance․
3․1 Main Components of the Freezer
The Rival Ice Cream Freezer consists of several key components essential for its operation․ The primary unit includes a durable outer casing that houses the motor and control panel․ Inside, there is a large, insulated freezer canister designed to hold the ice cream mixture during the churning process․ The canister is typically made of high-quality materials to ensure even freezing and durability․ Additionally, the freezer comes with a churning mechanism, such as a paddle or dasher, which mixes the ingredients to create a smooth texture․ Other components may include a lid to prevent contamination and a dispensing spout for easy serving․ Each part works together to facilitate efficient ice cream production․
3․2 Accessories Included with the Freezer
The Rival Ice Cream Freezer comes with essential accessories to enhance your ice cream-making experience․ These include a durable 32 oz․ freezer canister with a convenient dispensing spout, perfect for serving freshly made ice cream․ Additionally, an 8 oz packet of Rival’s ice cream mix is often provided, offering a quick start for new users․ The freezer also includes a comprehensive instruction manual, ensuring you can operate and maintain it effectively․ Some models may come with extra components like lids, measuring cups, or recipe booklets to inspire creativity․ These accessories are designed to make the process easy and enjoyable, helping you create delicious homemade ice cream with minimal effort․
3․3 Understanding the Control Panel
The control panel of the Rival Ice Cream Freezer is designed for intuitive operation, featuring clear buttons and displays to guide you through the freezing process․ The panel typically includes a power button, a timer, and a speed selector to customize your ice cream-making experience․ Some models may also have an “ingredient button” to ensure proper mixing when adding toppings or flavorings․ Indicator lights provide real-time feedback, such as when the freezer is operational or when it has completed the cycle․ The interface is user-friendly, allowing you to monitor progress and adjust settings effortlessly․ Always refer to the manual for specific button functions to ensure optimal performance and safety․ Proper use of the control panel enhances the overall freezing efficiency and consistency of your homemade ice cream․

Assembly and Preparation
Carefully unpack the Rival Ice Cream Freezer and ensure all components are included․ Follow the manual for assembling parts correctly․ Prepare the freezer by washing and drying it before first use․
4․1 Unpacking and Initial Setup
Carefully unpack the Rival Ice Cream Freezer and inspect for any damage․ Ensure all components, including the canister, lid, and instructions, are included․ Place the freezer on a stable, flat surface away from direct sunlight․ Before plugging in, ensure the outlet is polarized and matches the plug’s configuration․ Do not modify the plug, as this could cause safety hazards․ Read the manual thoroughly to familiarize yourself with the parts and operation․ Allow the freezer to reach room temperature before first use to prevent condensation buildup․ This initial setup ensures safe and proper functioning of the appliance․
4․2 Assembling the Freezer Components
To assemble the Rival Ice Cream Freezer, start by carefully unpacking all components, including the canister, motor unit, and churning paddle․ Place the motor unit on a stable surface and ensure the canister is aligned properly with the motor’s drive system․ Gently attach the canister to the motor, ensuring it clicks securely into place․ Next, insert the churning paddle into the canister, making sure it is fully seated and aligned with the motor’s rotation axis․ Check that the polarized plug is correctly aligned with the outlet to avoid any electrical issues․ Finally, ensure all parts are tightly secured and properly fitted before proceeding to the next step․ This assembly ensures smooth operation and optimal performance․
4․3 Preparing the Freezer for First Use
Before using your Rival Ice Cream Freezer for the first time, ensure it is properly prepared․ Begin by unpacking all components and washing the canister, lid, and dasher with warm, soapy water․ Rinse thoroughly and dry with a clean towel to prevent water spots․ Allow the canister to air dry completely, as any moisture can affect performance․ Once dry, place the canister in the freezer to chill for at least 6-8 hours before use․ This step is crucial for achieving the best results․ Finally, plug in the freezer and ensure all parts are securely assembled․ Refer to the manual for specific instructions to ensure everything is ready for your first batch of homemade ice cream․

Operating Instructions
Begin by preparing the ice cream canister as instructed․ Add your ingredients, ensuring the mixture is chilled․ Start the freezer, monitor the churning process, and add mix-ins as desired․
Allow the machine to complete its cycle for the best consistency․ Follow the manufacturer’s guidelines for optimal results and easy customization․
5․1 Basic Ice Cream Making Process
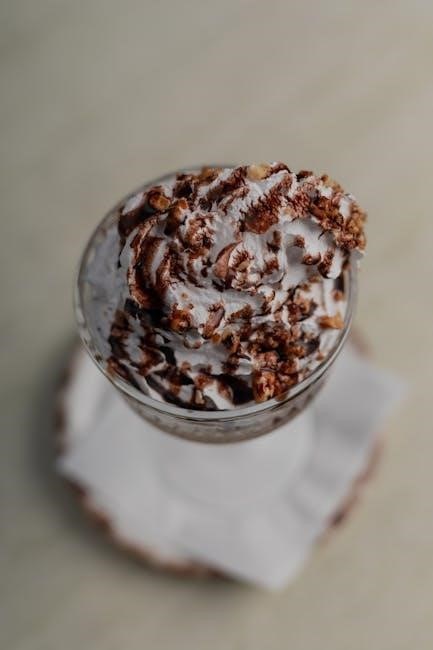
The basic process involves mixing your preferred ingredients, such as cream, sugar, and flavorings, in a bowl until well combined․ Chill the mixture in the refrigerator for at least 1 hour to ensure proper consistency․ Next, assemble the Rival Ice Cream Freezer according to the manufacturer’s instructions, ensuring all components are securely locked in place․ Pour the chilled mixture into the canister and set the freezer to the appropriate churning speed․ Allow the machine to run for about 20-30 minutes, or until the ice cream reaches your desired consistency․ During churning, you can add mix-ins like fruits or nuts for extra flavor and texture․ Once done, transfer the ice cream to an airtight container and freeze for a firmer texture, if desired․
5․2 Advanced Techniques for Customization
To elevate your ice cream-making skills, experiment with advanced techniques like layering ingredients or adding mix-ins at specific churning stages․ For a swirl effect, add sauces midway through churning․ Incorporate fresh fruits or nuts toward the end for texture․ Try infusing flavors by steeping vanilla beans or cocoa powder in the base before freezing․ Layering ingredients in the canister creates unique striped patterns․ For chunky mix-ins, fold them in during the final 2 minutes of churning․ These techniques ensure a personalized and professional finish to your homemade ice cream, making every batch a delightful creation․
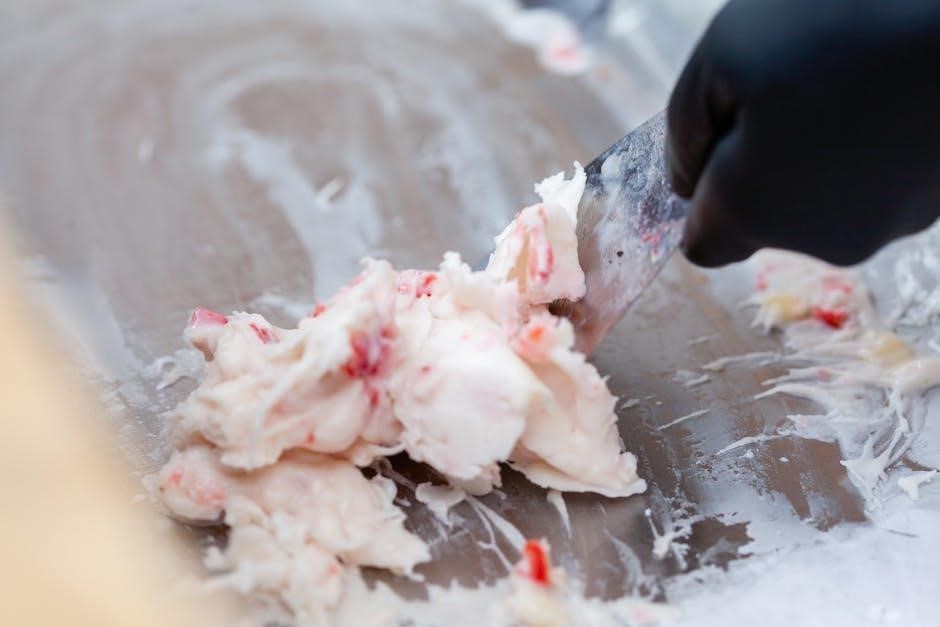
5․3 Adding Ingredients During Churning
Adding ingredients during churning is a great way to customize your ice cream․ For mix-ins like nuts, candy pieces, or fruit, wait until the mixture has thickened slightly, usually about 15-20 minutes into churning․ Pause the machine, add your ingredients, and resume churning to distribute them evenly․ For liquids or flavorings, like extracts or melted chocolate, add them gradually during the early stages of churning to ensure proper incorporation․ Avoid overloading the machine with too many mix-ins, as this can affect consistency․ Always chop larger ingredients into small pieces before adding them for the best results․ This step allows you to create unique and personalized ice cream flavors effortlessly․
Ingredients and Mix-Ins
Selecting the right ingredients ensures the best flavor and texture for your homemade ice cream․ Use fresh, high-quality components like cream, sugar, and natural flavorings․ Popular recipes include classic vanilla, strawberry, and chocolate․ For mix-ins, choose toppings like nuts, fruits, or candies, adding them during the churning process for even distribution․
6․1 Choosing the Right Ingredients
Selecting the right ingredients is crucial for achieving the perfect ice cream texture and flavor․ Start with fresh, high-quality components like heavy cream, whole milk, and granulated sugar for a creamy base․ Flavorings such as vanilla extract, cocoa powder, or fruit purees can be added to create unique tastes․ For mix-ins, opt for chopped nuts, chocolate chips, or fresh fruits to enhance variety․ Ensure all ingredients are chilled before use to maintain consistency․ Avoid over-sweetening, as mix-ins like chocolate or fruit will add natural sweetness․ Balance is key—too much sugar can make the ice cream overly sweet, while too little may dull the flavor․ Experiment with ingredients to find your perfect combination for delicious, customized results․
6․2 Popular Ice Cream Recipes
The Rival Ice Cream Freezer allows users to create a variety of delicious recipes, from classic vanilla to decadent chocolate․ For a timeless favorite, try a simple vanilla recipe using cream, sugar, and vanilla extract․ For chocolate lovers, add cocoa powder or melted chocolate for a rich flavor․ Strawberry ice cream is another popular choice, blending fresh strawberries with the base mixture․ Experiment with mix-ins like cookies, nuts, or candy pieces for added texture and flavor․ A basic recipe might include 2 cups heavy cream, 1 cup whole milk, 1/2 cup sugar, and a pinch of salt․ Churn according to the freezer’s instructions, adding mix-ins halfway through․ This versatility makes the Rival freezer a perfect tool for crafting unique and mouthwatering treats․
6․3 Handling Mix-Ins and Toppings
When adding mix-ins to your ice cream, timing is crucial; Introduce ingredients like nuts, fruits, or candy pieces during the churning process, but avoid overmixing to prevent damage․ For toppings, sprinkle them after the ice cream has finished churning to maintain texture․ Ensure mix-ins are evenly distributed for a balanced flavor․ Avoid adding excessive liquid-based ingredients, as they may disrupt consistency․ For best results, chop larger mix-ins into smaller pieces before incorporating them․ This method ensures a smooth and enjoyable texture in every bite․ Experiment with various combinations to create unique and delicious flavors tailored to your preferences․ Always follow the manufacturer’s guidelines for adding ingredients to maintain optimal performance․
Chilling and Freezing Instructions
For optimal results, ensure the ice cream canister is thoroughly chilled before use․ Understand recommended freezing times to achieve the perfect consistency and texture․
7․1 Preparing the Ice Cream Canister
To ensure optimal performance, the ice cream canister must be properly prepared before use․ Start by washing the canister with warm, soapy water and rinsing thoroughly to remove any residues․ Dry it completely with a clean towel to prevent water spots․ Next, place the canister in the freezer for at least 6-8 hours or overnight to chill․ This step is crucial for achieving the right consistency in your ice cream․ Once chilled, remove the canister from the freezer and immediately assemble it according to the manufacturer’s instructions․ Always follow the manual’s guidelines to avoid any issues during the freezing process․ Proper preparation ensures smooth operation and perfect results․
7․2 Understanding Freezing Times
Understanding freezing times is crucial for achieving the perfect consistency in your homemade ice cream․ The Rival Ice Cream Freezer typically requires 20-30 minutes to freeze the mixture to the desired consistency․ Preparation time includes chilling the canister beforehand, which ensures faster freezing․ Factors like the temperature of the mixture, the size of the canister, and the ingredients used can influence freezing duration․ For optimal results, ensure the canister is pre-chilled and the mixture is at the correct temperature before starting․ Avoid overfilling, as this can extend freezing time and affect texture․ By following these guidelines, you can achieve smooth, creamy ice cream every time․ Always refer to the manual for specific timing recommendations․
7․3 Tips for Achieving the Perfect Consistency
To achieve the perfect consistency with your Rival Ice Cream Freezer, ensure all ingredients are chilled thoroughly before churning․ This prevents ice crystals from forming and results in a smoother texture․ Use high-quality ingredients, as they directly impact the final consistency․ Avoid over-churning, as it can make the ice cream too airy or icy․ For mix-ins like fruits or nuts, add them toward the end of the churning process to maintain even distribution without breaking them down․ Finally, freeze the canister properly beforehand to ensure optimal performance․ By following these tips, you can create professional-quality ice cream with a creamy, uniform consistency every time․
Maintenance and Cleaning
Regular cleaning prevents residue buildup and ensures optimal performance․ Wipe the freezer with a damp cloth after use and dry thoroughly to avoid water spots․ Store properly when not in use․
8․1 Cleaning the Freezer After Use
Regular cleaning of the Rival Ice Cream Freezer is essential to maintain hygiene and prevent contamination; After each use, unplug the appliance and wash the canister and lid with mild detergent and warm water․ Avoid using abrasive cleaners or scourers, as they may damage the surfaces․ Rinse thoroughly and dry with a soft cloth to prevent water spots․ For tougher residue, soak the parts in warm soapy water before scrubbing gently․ Always ensure the freezer is completely dry before storing to avoid mold or odors․ Cleaning promptly after use ensures optimal performance and longevity of the appliance․
8․2 Storing the Freezer Properly
Proper storage of the Rival Ice Cream Freezer is essential to maintain its performance and longevity․ After cleaning, ensure the freezer is completely dry to prevent water spots․ Store it in a cool, dry place, away from direct sunlight or moisture․ Avoid stacking heavy objects on top of the freezer to prevent damage․ If not in use for an extended period, cover the unit to protect it from dust․ Always follow the manufacturer’s guidelines for storage to ensure optimal condition․ Regularly inspect the freezer for any signs of wear or damage before and after storage․ Proper storage will help preserve the freezer’s functionality and ensure it remains ready for future use․
8․3 Regular Maintenance Tips
Regular maintenance ensures the longevity and optimal performance of your Rival Ice Cream Freezer․ Always clean the appliance thoroughly after each use, paying attention to the canister, lid, and dashboard․ Dry all components to prevent water spots․ Lubricate moving parts periodically to maintain smooth operation․ Check the motor for dust buildup and ensure proper ventilation․ Store the freezer in a dry place when not in use to avoid moisture damage․ Regularly inspect the canister and churning blade for wear and tear; Follow the manufacturer’s guidelines for deep cleaning and parts replacement․ By adhering to these tips, you can enjoy consistent results and extend the lifespan of your freezer․

Troubleshooting Common Issues
Common issues include frozen mixtures and motor problems․ Check the polarized plug, avoid overloading, ensure proper temperature settings, and refer to the manual for solutions․
9․1 Diagnosing Common Problems
When troubleshooting the Rival Ice Cream Freezer, start by identifying the issue․ If the freezer doesn’t turn on, check the power source and ensure the plug is properly connected․ A frozen mixture may indicate overfilling or improper ingredient ratios․ If the motor stops, it could be overloaded or overheating․ Excessive noise might signal misaligned parts or worn components․ Water spots often result from improper drying after cleaning․ Always refer to the manual for specific error codes or unusual behavior․ Regular maintenance, such as cleaning and lubricating moving parts, can prevent many issues․ If problems persist, contact customer support for further assistance․
9․2 Solutions for Frozen Mixtures
If your ice cream mixture becomes too frozen during the churning process, it can lead to an overly hard texture․ To address this, ensure the mixture is at room temperature before pouring it into the canister․ If the mixture freezes too quickly, stop the machine and let it sit for a few minutes to soften slightly․ Scrape down the sides with a spatula to redistribute the mixture evenly․ Avoid over-churning, as this can cause ice crystals to form․ For optimal results, aim for a soft-serve consistency before transferring the mixture to an airtight container to harden in the freezer․ This ensures a smoother, creamier final product․
9․3 Addressing Motor Issues
If the motor of your Rival Ice Cream Freezer stops working or operates unevenly, check for potential causes․ Ensure the appliance is properly plugged in and the outlet is functioning․ Overloaded mixtures or excessive ingredient additions can strain the motor․ If the motor overheats, allow it to cool down before resuming use․ Unusual noises may indicate improper assembly or worn parts․ Refer to the manual for troubleshooting steps, and contact customer support if issues persist․ Regular maintenance, such as cleaning and lubricating moving parts, can prevent motor problems․ Always follow the manufacturer’s guidelines to ensure optimal performance and longevity of the appliance․
The Rival Ice Cream Freezer is an excellent choice for homemade treats, offering efficiency and customization․ Enjoy experimenting and taking your ice cream making to new heights!
10․1 Final Thoughts on Using the Rival Ice Cream Freezer
The Rival Ice Cream Freezer is an excellent addition to any kitchen, offering a fun and creative way to make homemade ice cream․ Its ease of use and customizable options make it a favorite for both beginners and experienced users․ With proper care and maintenance, this appliance will provide years of delicious results․ Users appreciate its ability to produce smooth, creamy textures and the flexibility to experiment with unique flavors․ Whether you’re making treats for family gatherings or indulging in personal cravings, the Rival Ice Cream Freezer delivers satisfaction․ Its durability and straightforward operation ensure it remains a trusted companion for all your frozen dessert needs․
10․2 Encouragement to Experiment and Enjoy
Experimenting with your Rival Ice Cream Freezer is a great way to unlock its full potential and create unique, personalized flavors․ Don’t be afraid to try new ingredients, mix-ins, and techniques to craft one-of-a-kind ice cream recipes․ Whether you’re making classic vanilla, decadent chocolate, or innovative combinations like matcha-green tea or strawberry-balsamic, the process is as enjoyable as the result․ Share your creations with family and friends, and take pride in serving homemade treats that are tailored to everyone’s tastes․ Embrace the creativity and fun that comes with making ice cream, and let the Rival Ice Cream Freezer become your go-to tool for sweet, memorable moments․